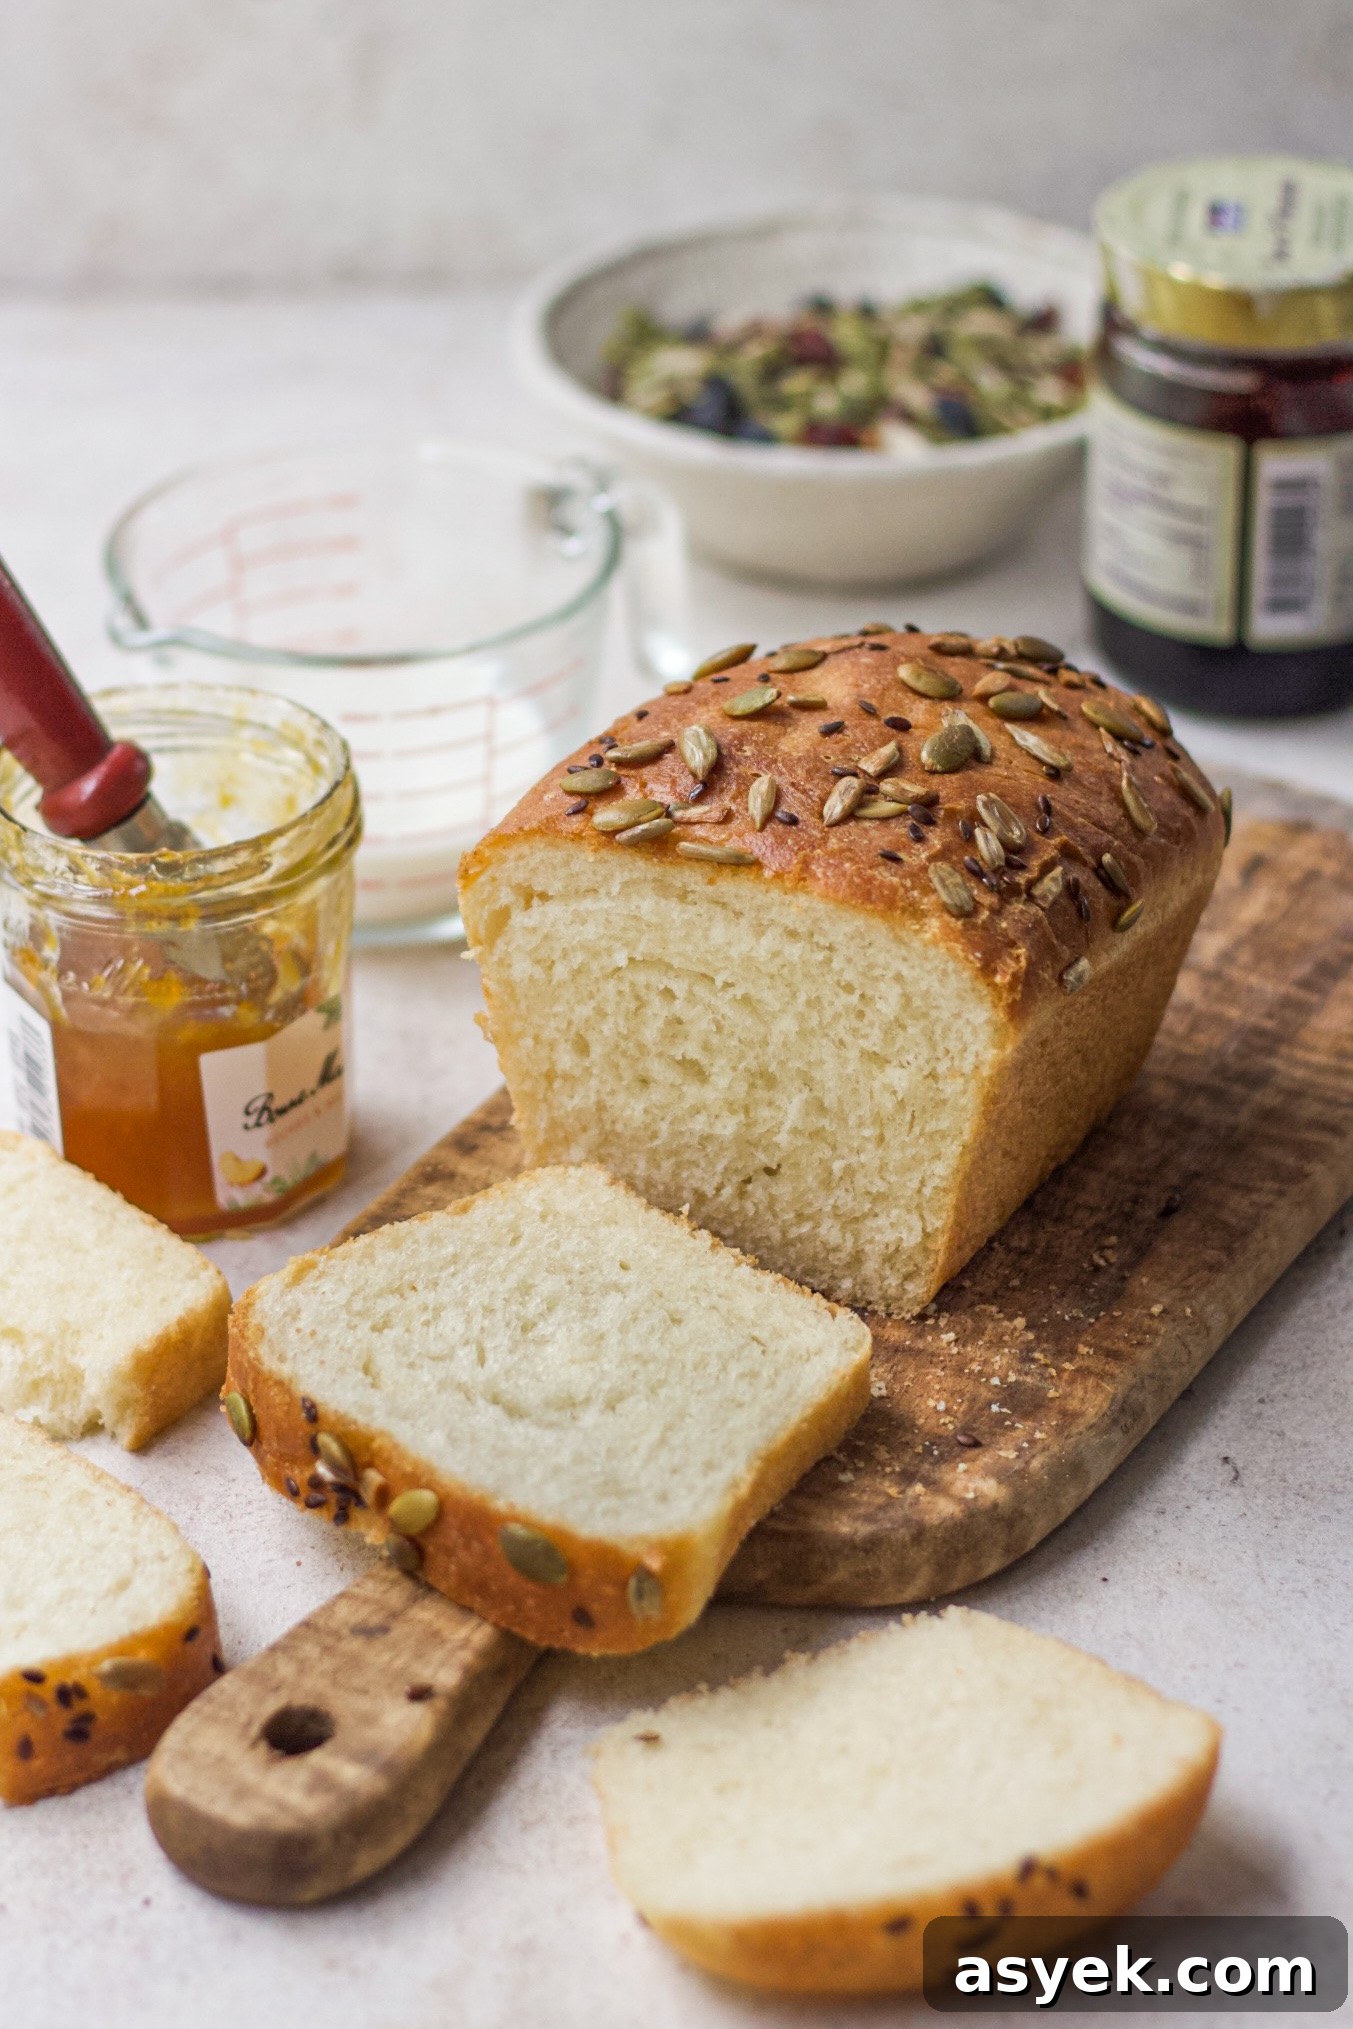
I have always loved suji bread — its tender crumb and subtle nutty flavor are irresistible. Recently I tried baking it in a pressure cooker instead of an oven, and the result was delightful. As the loaf baked, the kitchen filled with a warm, nutty aroma that made the wait even more enjoyable. The bread rose beautifully and developed a golden crust, giving me a homemade loaf that captured everything I love about suji bread.
What You’ll Love About This Recipe
- Eggless
- No special ingredients required
- No oven needed — baked successfully in a cooker
- A reliable suji (semolina) bread recipe
- Simple, beginner-friendly process
Ingredients Used in No-Oven Suji Bread
-
Semolina (Suji)
Semolina, made from durum wheat, has a coarser texture than regular wheat flour and lends a pleasant nutty flavor to bread. For suji bread, use finely ground semolina so it blends smoothly into the dough and creates a cohesive, soft crumb. If your semolina is coarse, pulse it briefly in a mixer to achieve a finer texture.
When included in the dough, semolina contributes subtle earthiness and a slightly sweet note that enhances the overall flavor of the loaf.
-
Yeast
Instant yeast is used for reliable and faster leavening. Unlike active dry yeast, instant yeast can be mixed directly with dry ingredients and typically reduces rising time. It feeds on the dough’s sugars to produce carbon dioxide, which creates the bubbles that make the bread rise.
-
Sugar
A small amount of sugar provides an immediate food source for the yeast and can help kickstart fermentation. Sugar also helps retain moisture in the crumb, contributing to a softer texture and a slightly longer shelf life.
-
Water
Water hydrates the flour and activates the yeast. It is essential for gluten development — the network of proteins that gives bread its structure — and it also creates steam inside a cooker, which helps set the crust while allowing the loaf to continue expanding.
-
Milk
Milk adds proteins and fats that tenderize the crumb, creating a softer, richer texture than water alone. Milk helps retain moisture, so bread made with milk tends to stay fresher for longer. Any type of milk can be used depending on preference.
-
Oil
Oil keeps the crumb tender and improves texture by coating gluten strands, which helps produce a lighter, more open crumb. Brushing the baked loaf with a little oil or butter after baking will help keep the crust soft.
Equipment for Making No-Oven Suji Bread
Using proper equipment makes the process easier and more consistent. At minimum, you will need measuring cups and measuring spoons for accurate ingredient portions.
A whisk and a wooden spoon are handy for mixing; a blender or grinder is useful for fine-grinding semolina if needed. A 7×4 inch loaf pan fits well inside a large cooker for this method.
Related Recipes
-
100% Suji Bread
-
100% Whole Wheat Bread
-
Healthy Banana Bread
Tips for Success
- If your semolina is coarse, grind it briefly in a mixer or food processor for a finer texture that blends better into the dough.
- Semolina absorbs more water than all-purpose flour, so the dough may feel wetter initially but will firm up as it rests.
- Knead thoroughly — 10–15 minutes — to develop gluten and build structure for a good rise.
- Allow the baked loaf to cool completely on a wire rack before slicing; cooling redistributes moisture and improves texture and flavor.
- Brush the warm loaf with butter or oil after baking to keep the crust soft and glossy.
How to Bake It in an Oven (Optional)
- Preheat the oven to 190°C (375°F) for 5–7 minutes.
- Bake the bread at 190°C for 25–30 minutes, or until the top turns golden brown.
- 1 1/2 cups suji (semolina), finely ground
- 1 tsp instant yeast
- 1 tbsp castor sugar
- 1/4 tsp salt
- 3 tbsp milk
- 1/2 cup water
- 2 tbsp oil
- Grind 1 1/2 cups of suji in a blender or grinder until fine, if using coarse semolina.
- In a bowl, whisk together the ground suji, sugar, instant yeast, and salt.
- Add water, milk, and oil, and mix with a wooden spoon or whisk to form a batter.
- Let the batter rest for 10 minutes so the semolina fully absorbs the liquid.
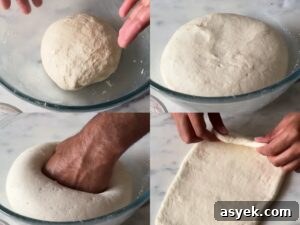
- Turn the dough out onto a greased surface and knead for about 15 minutes until smooth and elastic.
- Perform the windowpane test: stretch a small piece of dough between your fingers. If it stretches thinly and light passes through without tearing, the dough is ready for proofing.
- Place the dough in a large bowl greased with oil, cover with a cloth, and proof in a warm, dark place for about 1 hour or until doubled in volume.
- After the first proof, gently knock down the dough to release excess air.
- Roll the dough into a rough rectangle about 1/2 inch thick, then roll it up from the shorter side into a log, pinching seams to seal.
- Place the log into a greased 7×4 inch loaf pan and proof for another 30 minutes or until doubled.
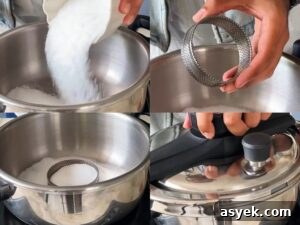
- Meanwhile, prepare a cooker on medium heat: sprinkle a layer of salt on the bottom and place a stand in the center, preheating for about 10 minutes.
- Brush the risen loaf with milk and sprinkle seeds if desired.
- Bake the bread in the preheated cooker for about 25 minutes, or until the top is golden brown.
If you try this no-oven suji bread at home, please share your photos on Instagram and tag me using #Bakewithshivesh. Happy baking!